Windows Setup
- Connect your new laptop to the AC adapter and power it on
- Select your Region and Keyboard Layout
- Connect to Wi-Fi, then click Next
- If you are on a Cisco site, do not connect to
"blizzard" . Instead, click here for instructions to connect to "internet" - After you connect to the network, you will see a Checking For Updates screen. Your machine may restart a few times during this process
- If you are on a Cisco site, do not connect to
- Accept the license agreement if prompted
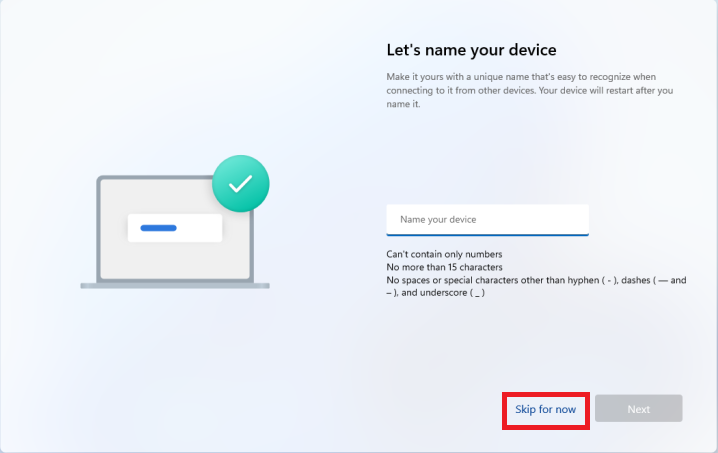
- If you you see the
Let's name your device
screen, click Skip for now
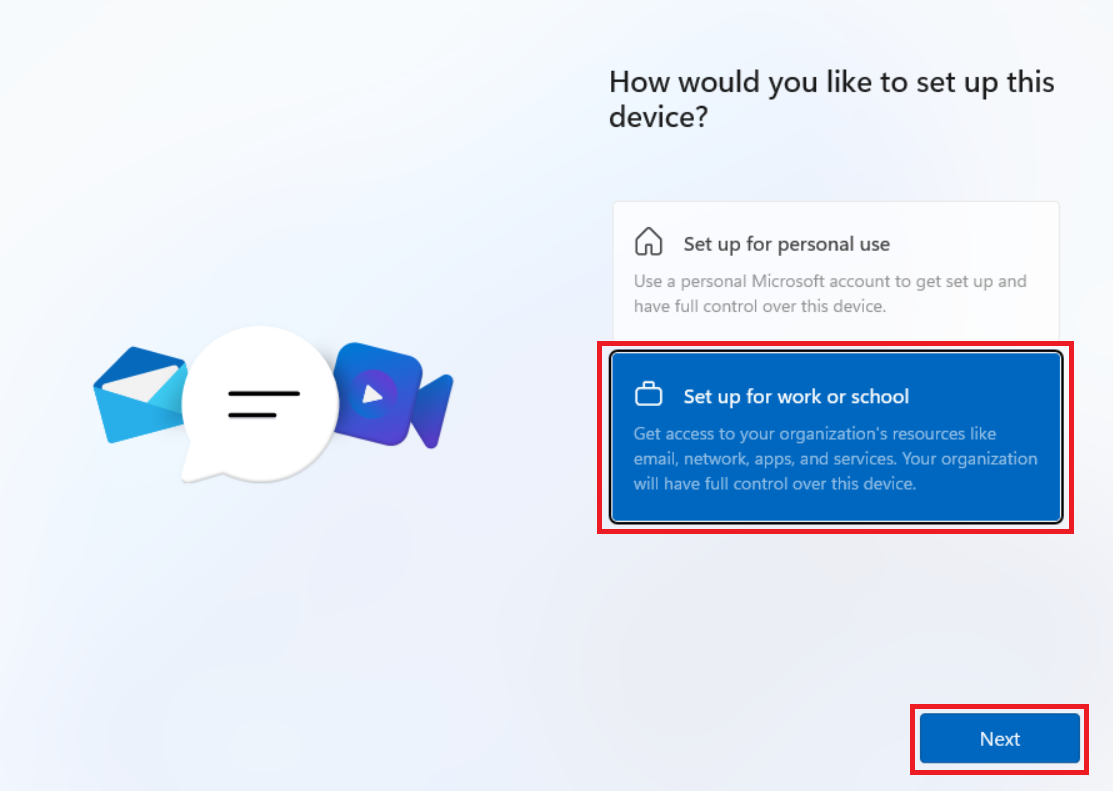
- If you you see the
How would you like to set up this device?
screen, select Set up for work or school and click Next
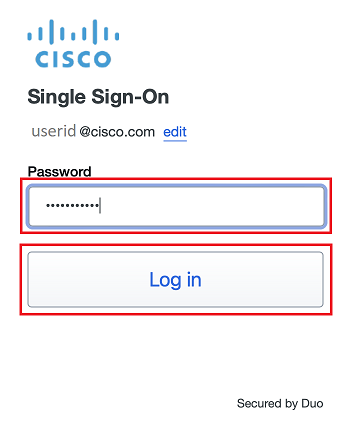
- Enter your Cisco email address and click Next
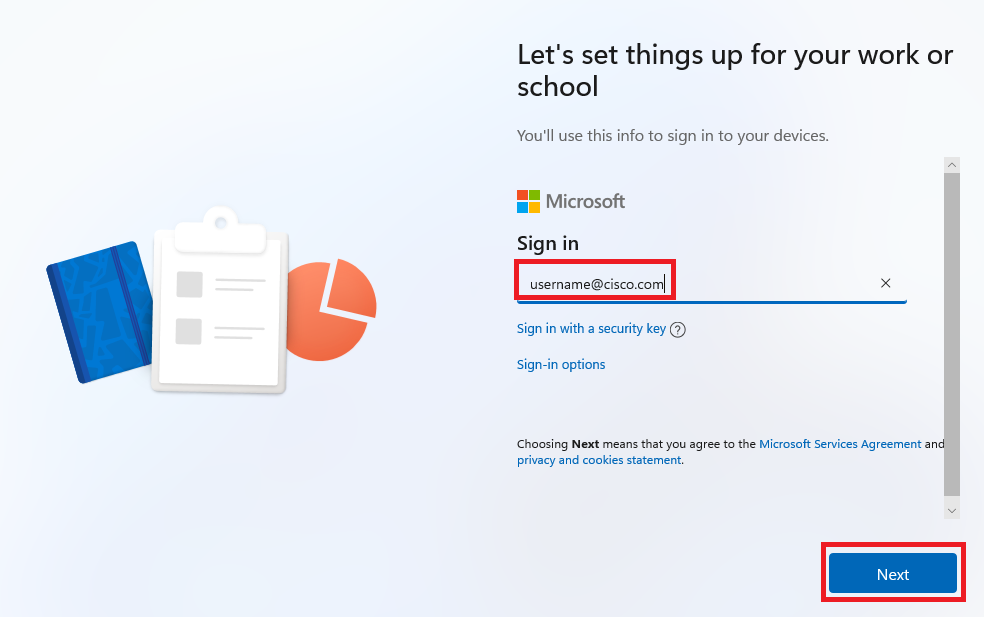
- Enter your Cisco email address and click Next
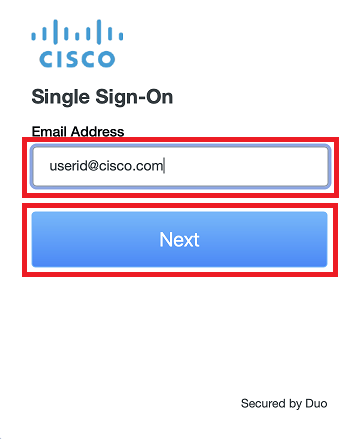
- Enter your Cisco temporary password and click Log In
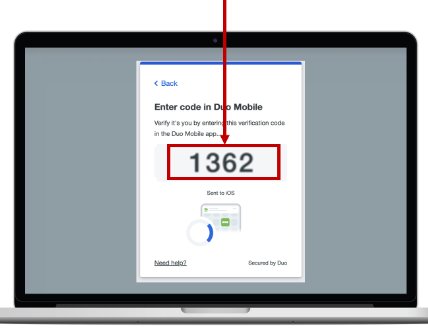
- A Duo Verified Push code will pop up on your Cisco device
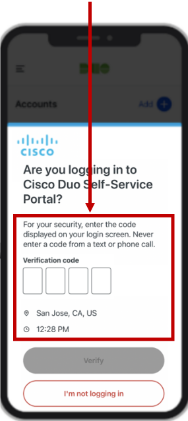
- Verify it is you logging into your Duo app. Did you initiate this push?
- Note: you might have to scroll down to see the verification code prompt
- Enter the verification code when prompted
- Only use the code provided within the Duo login prompt from your Cisco device
- NEVER enter a code provided by a third-party, including:
- The Cisco help desk
- Text message (SMS)
- A phone call or email

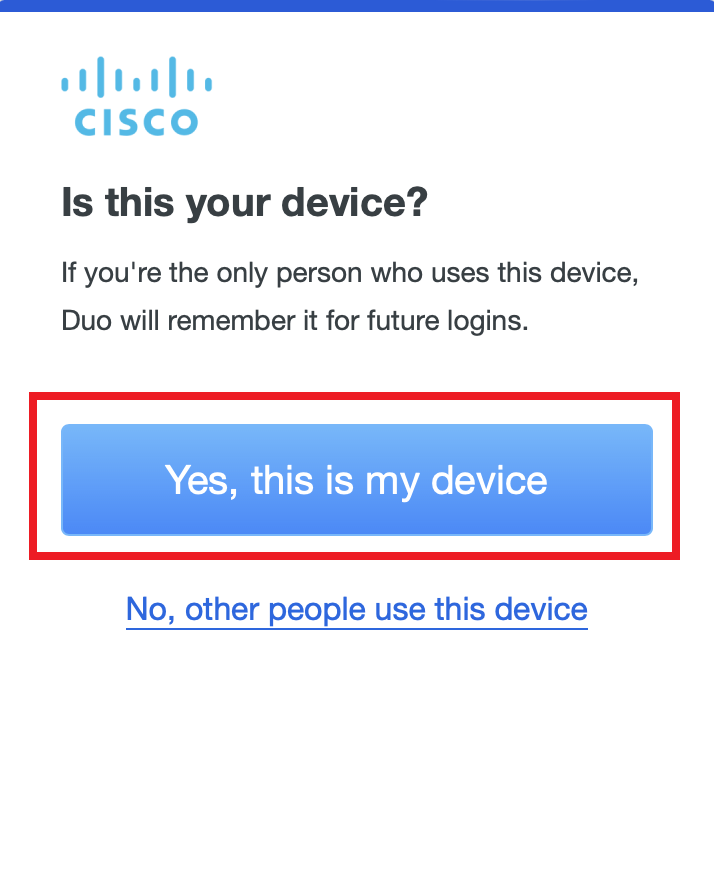
- Click Yes, this is my device
- On the
Setting up for work or school
screen, wait for each step to complete
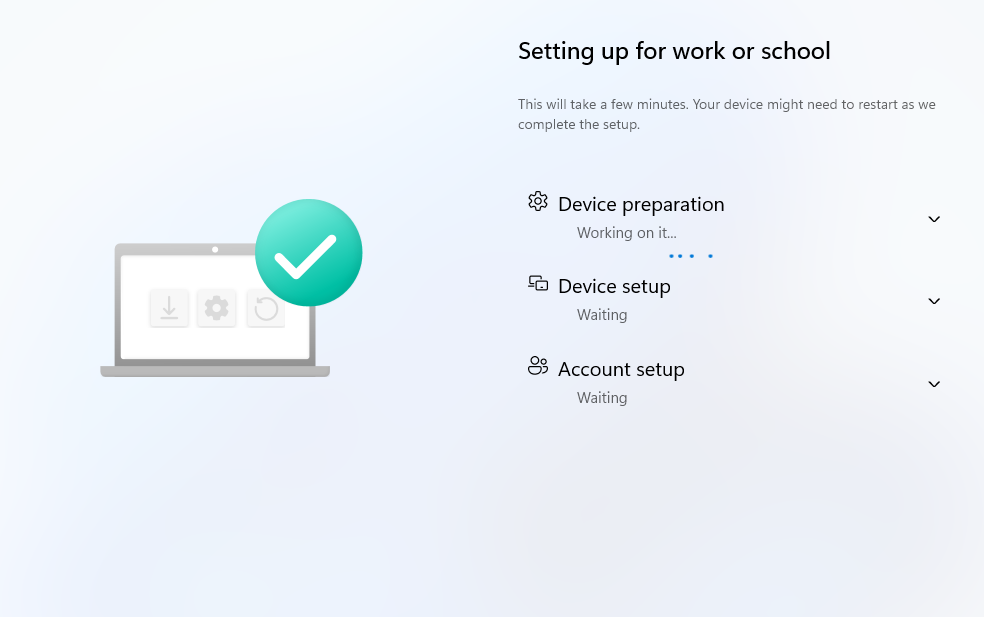
- Note: How long this takes depends on your internet connection. On a slow connection, this could take several hours
- You may see some screens that allow you set some Microsoft settings e.g. use of voice, use of location etc. We recommend selecting
No or Off for all
- If you see a Windows login screen, sign in with your Cisco Username and temporary password
- You will see the
Setting up for work or school
screen again. Wait for each step to complete and you will be taken to the Desktop
- You can click the down arrow next to each step to check the progress
- You will be prompted to set up Windows Hello when the configuration process is complete
- Note: How long this takes depends on your internet connection. On a slow connection, this could take several hours